Rocket.chat
What is Rocket.chat
Rocket.Chat is an open-source fully customizable communications platform developed in JavaScript for organizations with high standards of data protection. It is licensed under the MIT License with some other licenses mixed in. See Rocket.chat GitHub for licensing information.
This is based on authentik 2022.3.1 and Rocket.chat 4.5.1 using the Docker-Compose install. Instructions may differ between versions.
Preparation
The following placeholders will be used:
rocket.companyis the FQDN of Rocket.chat.authentik.companyis the FQDN of authentik.
Step 1
In authentik, under Providers, create an OAuth2/OpenID Provider with these settings:
Only settings that have been modified from default have been listed.
Protocol Settings
- Name: RocketChat
- Client ID: Copy and Save this for Later
- Client Secret: Copy and Save this for later
- Redirect URIs/Origins:
https://rocket.company/_oauth/authentik

Step 2
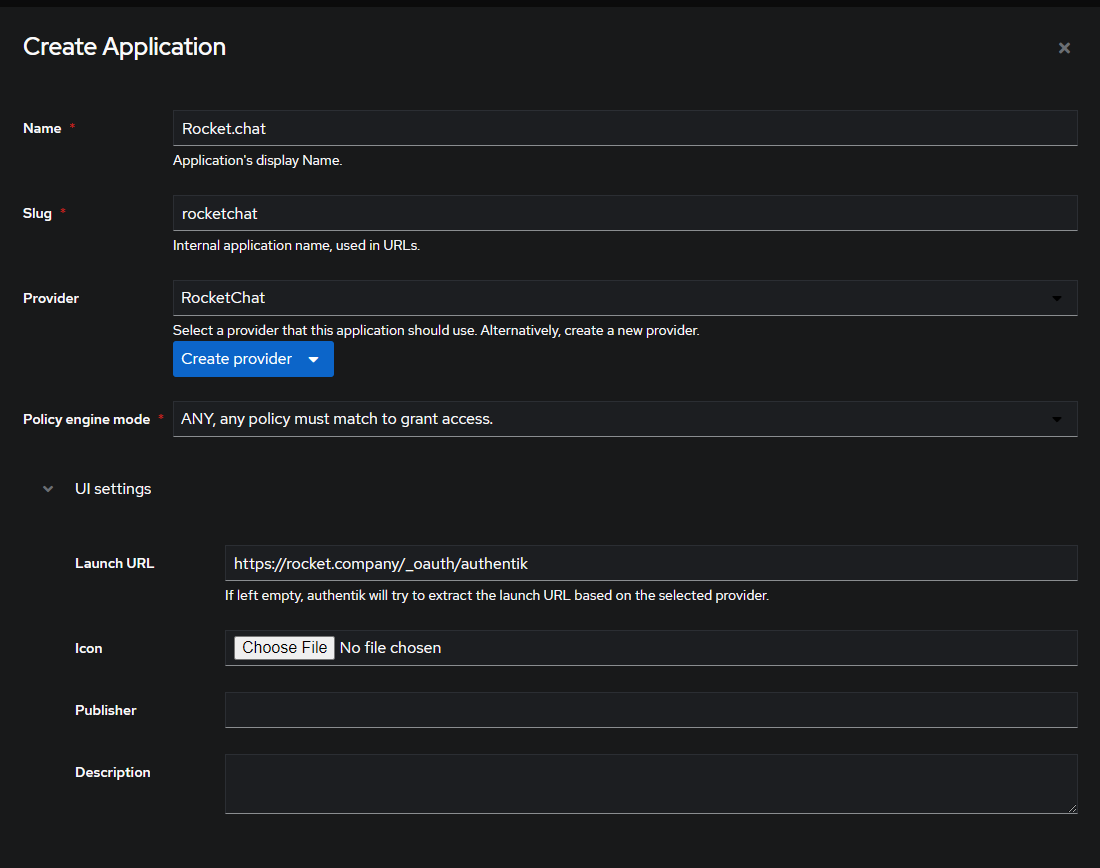
In authentik, under Applications, create a new application with these settings:
Application Settings
- Name: Rocket.chat
- Slug: rocketchat
- Provider: RocketChat
- Launch URL:
https://rocket.company/_oauth/authentik
Step 3
Only settings that have been modified from default have been listed.
You may have different settings for some of the group and role mapping for advanced configurations. The settings below are the base settings to connect authentik and Rocket.chat.
In Rocket.chat, follow the procedure below:
-
Log in as a System Administrator, click on your avatar, and choose Administration
-
Scroll down and click on OAuth
-
In the top right corner, click Add custom oauth
-
Give your new oauth the name of Authentik, then click Send

-
Scroll down to the new OAuth application, expand the dropdown, and enter the following settings:
- Enable: Turn the radio button to the on position
- URL: https://authentik.company/application/o
- Token Path: /token/
- Token Sent Via: Payload
- Identity Token Sent Via: Same as "Token Sent Via"
- Identity Path: /userinfo/
- Authorize Path: /authorize/
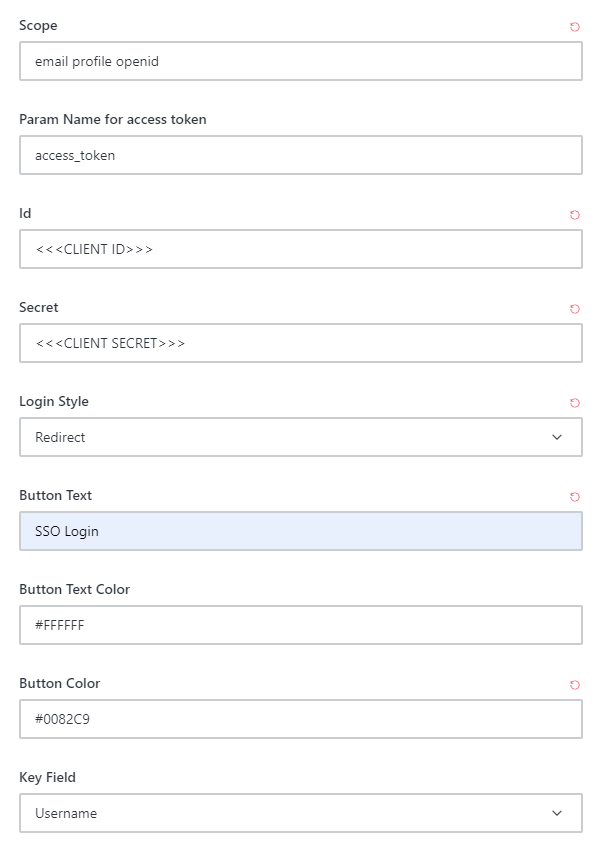
- Scope: email profile openid
- Param Name for access token: access_token
- Id: THIS IS THE CLIENT ID YOU COPIED FROM STEP 1 in authentik
- Secret: THIS IS THE CLIENT SECRET YOU COPIED FROM STEP 1 in authentik
- Login Style: Redirect
- Button Text: Fill in with what you want the SSO button to say
- Button Text Color: Hex Color for Text on the SSO login button
- Button Color: Hex Color for the SSO login button
- Key Field: Username
- Username field: preferred_username
- Email field: email
- Name field: name
- Roles/Groups field name: groups
- Roles/Groups field for channel mapping: groups
- User Data Group Map: rocket.cat
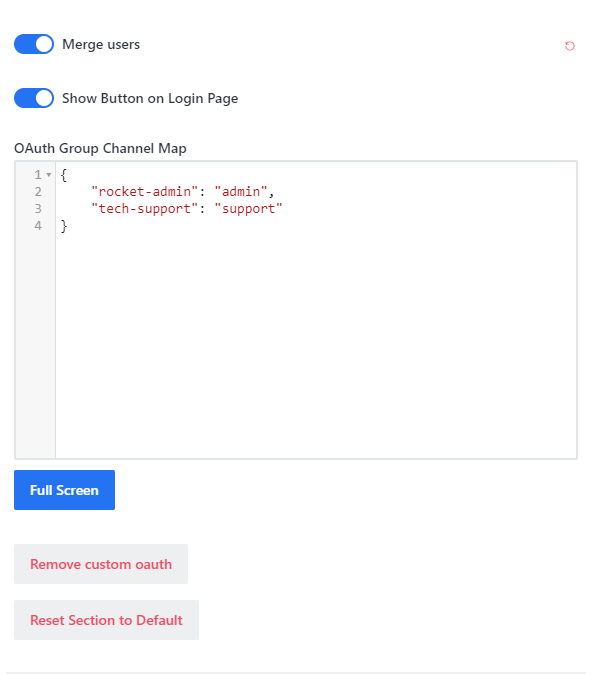
- Merge users: Turn the radio button to the on position
- Show Button on Login Page: Turn the radio button to the on position


-
Click Save changes in the top right corner of the screen
Step 4 (Optional)
By default, Rocket.chat will attempt to use two-factor authentication with any new user coming in to the system and allows users to change their information
To disable changing user information and other options inside Rocket.chat:
Navigate to the Accounts settings to change the following:
- Allow Name Change: Off
- Allow Username Change: Off
- Allow Email Change: Off
- Allow Password Change for OAuth Users: Off
If you are using Two Factor authentication through authentik:
Navigate to the Accounts settings, Scroll Down to Two Factor Authentication and turn off Enable Two Factor Authentication
Registration Options Navigate to the Accounts settings, Scroll Down to Registration and choose your registration options, such as:
- Registration Form: Disabled